
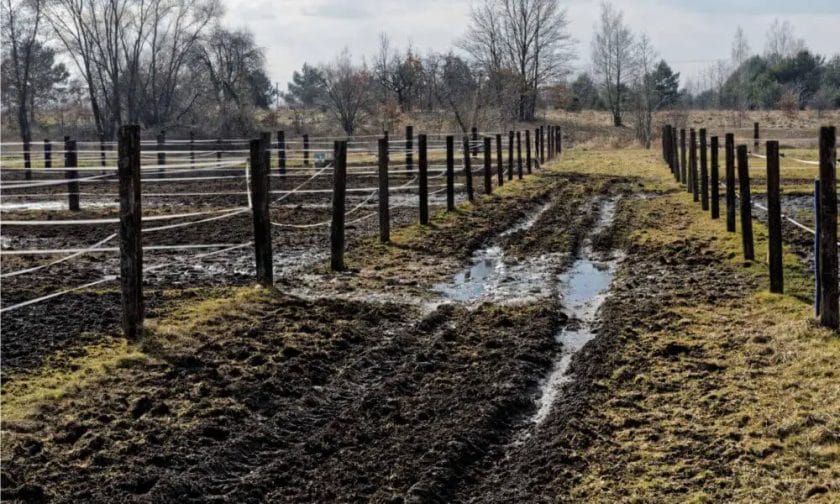
If you’re dealing with a muddy horse paddock, it’s crucial to address the issue promptly for the safety and well-being of your horses. Muddy areas can lead to hoof problems, slips, and discomfort. The good news is that there are several effective ways to fix muddy horse paddock areas. From improving drainage and adding gravel or sand to implementing mud management strategies and regular maintenance, you can create a safer and more comfortable environment for your equine companions. Discover the best solutions to fix muddy horse paddock areas and provide your horses with a clean and stable footing.
Choosing the Right Footing Material for Muddy Paddock Areas
When it comes to creating a safe and functional environment for your horses, choosing the right footing material for muddy paddock areas is essential. Muddy paddocks can not only cause discomfort and frustration for your horses, but they can also pose serious health risks. To prevent mud from accumulating and creating slippery and unsanitary conditions, it is important to select a footing material that promotes proper drainage, provides traction, and is easy to maintain.
1. Gravel:
Gravel is a popular choice for footing material in muddy paddock areas. It offers excellent drainage and helps to keep the surface stable. When using gravel, it is important to choose a size that is suitable for the intended use. A larger size gravel, such as ¾ inch or 1 inch, is ideal for heavy traffic areas, as it provides better stability. However, smaller sized gravel, like pea gravel, can be used in less heavily used areas or for areas where softness is desired. It is important to properly maintain the gravel footing by regularly adding additional gravel and raking to prevent potholes from forming.
2. Sand:
Sand is another popular footing material for muddy paddock areas. It offers good drainage, provides cushioning for the horses’ joints, and is relatively inexpensive. However, it is important to choose the right type of sand for your paddock. Angular sand with sharp edges is preferable to round sand, as it provides better traction. Additionally, using a coarse sand rather than a fine sand can help to prevent compaction and improve drainage. Regular maintenance of the sand footing is necessary to prevent it from becoming compacted or uneven. This can be done by raking and adding fresh sand as needed.
3. Rubber Matting:
Rubber matting is a popular choice for creating a durable and low maintenance footing in muddy paddock areas. It offers excellent traction, is easy to clean, and provides cushioning for the horses’ joints. Rubber matting can be installed over a compacted gravel or sand base to improve stability and drainage. It is important to choose a thickness and density of rubber matting that is suitable for the intended use. Thicker and denser rubber matting is ideal for high traffic areas, while thinner and less dense matting can be used for less heavily used areas. Regular cleaning and maintenance of the rubber matting is necessary to prevent the buildup of mud and debris.
4. Wood Chips:
Wood chips can be a cost-effective and environmentally friendly option for footing in muddy paddock areas. They offer good drainage and provide some cushioning for the horses’ hooves. When using wood chips, it is important to select a type that is free from toxic substances and harmful chemicals. Hardwood chips are generally preferred over softwood chips, as they are more durable and long-lasting. Regular replenishment of the wood chips is necessary to maintain a consistent footing surface, as they can break down over time.
5. Geotextile Fabric:
Geotextile fabric is a synthetic material that can be used as a base layer under other footing materials to improve drainage and stability in muddy paddock areas. It helps to prevent the mixing of the footing material with the underlying soil and promotes proper water flow. Geotextile fabric should be installed by a professional to ensure proper placement and effectiveness. Regular maintenance of the footing material on top of the geotextile fabric is still necessary to prevent compaction and maintain a safe and functional surface.
In summary, choosing the right footing material for muddy paddock areas is crucial for the well-being of your horses. Gravel, sand, rubber matting, wood chips, and geotextile fabric are all viable options, each with its own advantages and considerations. By selecting a footing material that promotes proper drainage, provides traction, and is easy to maintain, you can create a safe and comfortable environment for your horses to enjoy.
Implementing Proper Grazing Rotation to Prevent Paddock Muddiness
Proper grazing rotation is an essential practice for maintaining healthy pastures and preventing paddock muddiness. When livestock are allowed to graze on the same area for an extended period, the ground becomes compacted, leading to soil erosion and water runoff. This not only damages the pasture but also affects water quality and contributes to paddock muddiness.
Grazing rotation involves dividing the pasture into smaller paddocks and regularly moving livestock to fresh grazing areas. This allows the pasture to rest and recover while preventing overgrazing and soil compaction. By implementing a proper grazing rotation system, farmers can effectively manage their pastures and reduce the occurrence of paddock muddiness.
Benefits of Proper Grazing Rotation
Implementing a proper grazing rotation system offers several benefits that contribute to the overall health and productivity of the pasture. These benefits include:
- Improved pasture quality: By allowing pastures to rest and recover, the grass can grow back and become more nutritious for livestock.
- Reduced soil compaction: Regularly moving livestock to fresh grazing areas prevents overgrazing and soil compaction, which improves water infiltration and reduces the risk of paddock muddiness.
- Enhanced nutrient cycling: Proper grazing rotation allows manure to be distributed evenly across the pasture, promoting nutrient cycling and reducing the need for artificial fertilizers.
- Increased forage utilization: Livestock are more likely to graze evenly across the pasture when moved regularly, resulting in better forage utilization and reduced waste.
- Improved water quality: By preventing soil erosion and reducing runoff, proper grazing rotation helps maintain water quality in nearby streams and water bodies.
Implementing Proper Grazing Rotation
Implementing a proper grazing rotation system requires careful planning and management. Here are some steps to follow:
- Divide the pasture: Divide the pasture into smaller paddocks using electric fences or temporary fencing. The size of each paddock will depend on factors such as the number of livestock and the available forage.
- Establish a rotation schedule: Develop a rotation schedule based on the number of paddocks and the desired rest period for each. Livestock should be moved to a new paddock once the available forage in the current one has been sufficiently grazed.
- Monitor grazing intensity: Regularly assess the condition of the pasture and adjust the rotation schedule as needed. Avoid overgrazing by moving livestock to the next paddock before the forage in the current one becomes severely depleted.
- Allow for adequate rest: Ensure that each paddock has enough time to rest and recover before livestock are reintroduced. The rest period will depend on factors such as the growth rate of the grass and the weather conditions.
- Manage water sources: Provide livestock with access to clean water in each paddock to prevent concentration in one area and reduce the risk of soil compaction and muddiness.
In summary, implementing proper grazing rotation is crucial for preventing paddock muddiness and maintaining healthy pastures. By dividing the pasture into smaller paddocks and regularly rotating livestock, farmers can improve pasture quality, reduce soil compaction, enhance nutrient cycling, increase forage utilization, and improve water quality. It is essential to carefully plan and manage the grazing rotation system to ensure optimal results and long-term sustainability.
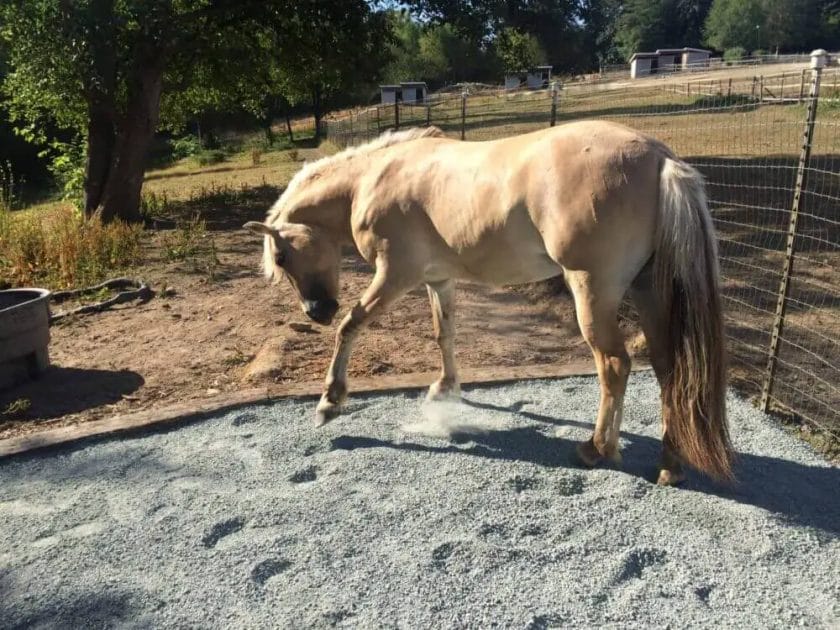
Creating Paved or Gravel Pathways in Horse Paddocks
When it comes to managing and maintaining horse paddocks, one important aspect to consider is creating pathways for easy access and movement. Paved or gravel pathways can provide several benefits, including improved drainage, reduced mud, and increased safety for both horses and handlers. In this section, we will discuss the steps involved in creating paved or gravel pathways in horse paddocks.
1. Planning and Preparation
The first step in creating paved or gravel pathways is to carefully plan and prepare the area. Start by determining the desired location and width of the pathway. Consider the traffic flow and accessibility when deciding on the pathway’s width. Make sure to mark the pathway’s boundaries using stakes or spray paint.
Next, remove any existing vegetation or debris from the pathway area. Clear the area of rocks, branches, and other potential obstructions that may affect the pathway’s integrity. It’s essential to have a clean and level surface before proceeding with the installation.
2. Excavation and Grading
Once the area is properly prepared, the next step is to excavate and grade the pathway. Use a shovel, mini excavator, or a similar tool to remove the topsoil and create a trench for the pathway. The depth of the trench will depend on the desired thickness of the base material and the type of paving or gravel chosen.
After excavating the pathway, use a landscaping rake or a grading implement to level and smooth the area. Proper grading will ensure proper drainage and prevent the formation of puddles or uneven surfaces.
3. Installing Base Material
The base material provides stability to the pathway and helps with drainage. It acts as a foundation for the paving or gravel. The type and thickness of the base material will depend on the intended use and the specific requirements of the paddock.
For paved pathways, a compacted aggregate base is typically used. This may consist of crushed stone, gravel, or recycled concrete. Spread the base material evenly within the excavated area and compact it using a plate compactor or similar equipment. Aim for a depth of 4 to 6 inches for optimal stability.
For gravel pathways, a similar process is followed, but the base material may consist of larger gravel particles. Aim for a compacted depth of 2 to 4 inches, depending on the type of gravel used.
4. Paving or Gravel Installation
Once the base material is in place and properly compacted, it’s time to install the desired paving or gravel material. This could include concrete pavers, interlocking bricks, or various types of gravel.
If you are using concrete pavers or interlocking bricks, carefully follow the manufacturer’s instructions for installation. Ensure that the pavers or bricks are properly aligned and leveled. Use a rubber mallet or a similar tool to secure them in place.
For gravel pathways, choose a suitable type and size of gravel. Spread the gravel evenly over the prepared base, ensuring a consistent thickness. Use a rake or a shovel to smooth and level the gravel surface.
5. Maintaining the Pathway
Once the paved or gravel pathway is installed, regular maintenance is necessary to ensure its longevity and usability. Keep the pathway free from debris, such as leaves, branches, or manure. Regularly inspect the surface for any signs of erosion, unevenness, or damage.
If necessary, add additional gravel or repair any damaged paving elements. Consider using a power washer or hose to clean the pathway periodically, especially if it becomes muddy or stained.
Summary
Creating paved or gravel pathways in horse paddocks can greatly enhance the functionality and aesthetics of the space. By carefully planning, excavating, installing a base material, and choosing the appropriate paving or gravel, you can create durable and accessible pathways for your horses. Remember to regularly maintain the pathway to ensure its longevity and safety.
Regular Maintenance Practices to Keep Horse Paddock Areas Mud-Free
Having a mud-free horse paddock is essential for the health and well-being of your horses. Mud can lead to a range of issues, including hoof problems, respiratory issues, and increased risk of injury. To ensure a mud-free paddock, it is important to implement regular maintenance practices. In this section, we will discuss some effective maintenance practices to keep your horse paddock areas mud-free.
1. Proper Drainage
One of the most important factors in preventing mud in horse paddock areas is proper drainage. Ensure that your paddocks are graded in such a way that water can flow away easily. Consider installing French drains or gutters to divert water away from paddock areas. Regularly check and clean existing drainage systems to avoid blockage.
2. Strategic Landscaping
Implementing strategic landscaping techniques can make a significant difference in keeping your horse paddock areas mud-free. Planting grass, shrubs, or trees around paddocks can help absorb excess moisture from the ground. Additionally, consider creating a buffer zone between the paddock and any nearby water sources to prevent runoff.
3. Regular Manure Management
Regular manure management is crucial in maintaining a mud-free paddock. Remove manure from paddocks on a daily basis and dispose of it properly. This not only helps prevent mud formation but also reduces the risk of parasites and diseases. Consider composting the manure for use as fertilizer.
4. Proper Footing Materials
The type of footing material used in the paddock plays a significant role in preventing mud. Avoid using materials that retain water, such as clay or gravel. Instead, opt for materials like sand or wood chips that provide good drainage. Regularly monitor the condition of the footing material and replace or replenish as needed.
5. Rotation and Rest
Rotating your horses between different paddocks can help prevent mud formation by allowing the rested paddocks to recover. Resting the paddocks for a certain period also allows the grass to regrow and strengthen the ground. Plan a rotational schedule and ensure adequate rest periods for each paddock.
6. Regular Maintenance
Consistent maintenance is key to keeping your horse paddock areas mud-free. This includes removing any debris or rocks regularly, filling in any low spots, and reseeding as needed. Regularly inspect the paddock areas for any signs of erosion or damage and address these issues immediately.
7. Control Traffic Flow
Controlling the traffic flow in the paddock can help prevent excessive compaction and mud formation. Limit the number of horses allowed in the paddock at any given time and create designated walkways or feeding areas to minimize trampling. Avoid turning horses out in wet conditions or when the ground is already saturated.
8. Consider Shelter Options
Providing shelter options in the paddock can help minimize mud formation. Sheltered areas can protect the ground from excessive rain and reduce the amount of mud in high traffic areas. Consider installing run-in sheds or using natural barriers, such as trees or hedges, to provide shelter for your horses.
In summary, implementing regular maintenance practices is essential to keep horse paddock areas mud-free. By ensuring proper drainage, strategic landscaping, regular manure management, using suitable footing materials, practicing rotation and rest, conducting regular maintenance, controlling traffic flow, and considering shelter options, you can create a healthy and mud-free environment for your horses.
FAQs
1. How can I fix muddy areas in my horse paddock?
To fix muddy horse paddock areas, start by assessing the drainage issues. Improve the soil structure by adding gravel or sand and grading the area to promote proper water runoff. You can also install French drains or ditches to redirect water away from the paddock. Consider using geotextile fabric and adding a layer of footing material, such as wood chips or rubber mats, for better footing and drainage.
2. What measures can I take to prevent muddy patches in my horse paddock?
To prevent muddy patches in your horse paddock, ensure proper drainage by grading the area to create a gentle slope. Regularly remove manure to prevent excessive moisture buildup. Consider using geotextile fabric or installing a geotextile footing system to provide better drainage. Limit the number of horses in the paddock and rotate grazing areas to prevent overgrazing and compaction of the soil.
3. Can I use gravel to fix muddy areas in my horse paddock?
Yes, gravel can be used to fix muddy areas in a horse paddock. Adding a layer of gravel can improve drainage and stability. It is best to use crushed rock or angular gravel that will interlock and provide better support. Avoid using round or smooth gravel that may become slippery. Additionally, consider using geotextile fabric underneath the gravel to prevent mixing with the soil.
Conclusion
In conclusion, addressing and fixing muddy horse paddock areas is essential for the health and well-being of horses. By following proper management practices, such as improving drainage, regular mucking out, and strategic use of gravel or sand, you can significantly reduce mud problems in paddocks. Additionally, providing shelter and utilizing pasture rotation can help prevent overgrazing and minimize soil erosion. It’s important to remember that each paddock is unique, so tailor your solutions accordingly. Ultimately, by implementing these measures, you can create a safer and more comfortable environment for your horses, ensuring their optimal health and happiness.